Tuesday, August 26, 2014

OOTD: Summer Brights with a kiss of fall


Say it ain't so! There's a lot of chatter about fall quickly descending upon us. Don't get me wrong I like the crisp fall air, cinnamon infused baked goods & obvi pumpkin as much as the next gal- but I do love summer. I grew up in Tucson and it's summer practically year 'round. I have spent several years on the east coast and have been privy to all of the seasons. So, I'm kinda excited to be in a climate again that everyday is a forecast of sunny & gorgeous ((ask me next year though- I might have more of a yearning for fall weather)). Or even ask me in a couple of months when I feel like it's too warm to wear my fab coats, boots and scarves. I may just change my tune- but for now, fall isn't really on my radar and I'm soaking up the last of summer.

Hot Pink Clutch: Target-Old

Dress: Forever21- Click Here

Neon Coral Earrings: J.Crew- Old
For Southern California- the nights get cool pretty quickly, so for the fall lover out there this one is for you! I threw on a neutral over-sized shrug for warmth without detracting from the overall look. It's like a snugly and fashionable blanket all in one- yes!

Over-sized Shrug: Forever21: Similar- Click Here


Shoes: Major Sale at Anthropologie- Sold Out

Get extra mileage out of your jewels- wear them as intended or throw 'em on backwards. Who doesn't love a two-fer!

Gold Tassel Necklace: Forever 2- Click Here
What's your favorite season to dress for?

Thursday, August 21, 2014

On Wednesdays We Wear Pink: Hot Pink

Today's post features my mid-week look. I'm coming at ya with bright colors, glitz and pattern mixing, otherwise known as a power clash. I am absolutely over the moon with where fashion trends and style choices are taking a no-holds-barred approach. Bold floral and a chevron patterned clutch? Yes, please!

Necklace: Style: Barbie Doll- The Way We Are / Blazer & Dress (sold out): J. Crew Outlet / Clutch: Marshalls (old)

Similar Dress: Click Here

Similar Shoe (& on clearance) Click Here


So, go out there and be bold- you want to wear polka dots and paisley?- do it! Be fearless with your fashion and own it with confidence. Plus, you're going to have so much fun combining things you never thought would "go" and it will seem like your closet doubled!

What's your favorite power clash combo?
XoXo
{Peace}


Outtake Status :)

Wednesday, August 20, 2014

When you're handed a lemon, bake a cake


The inspiration
PS: if you're under 21 you won't be able to bake this cake with the recommended ingredients so check out this one instead :)

Okay this isn't one of those "when life hands you lemons" moments but rather a you bought something that turned out to be a lemon {eyebrow raise}. I rarely imbibe, like pretty much never- I'd rather save those calories for dessert.  So I'm not sure why I chose to purchase this bottle of Southern Comfort Cherry- I think it was the tag-line "Bold Black Cherry" ( I love cherry flavor). So, this was, um, not good,  as my fiance put it- "it tastes like cough syrup." Honestly, I think NyQuil's cherry flavor has a better taste.  Not one to be wasteful, I was determined not to let those $12 bucks be a total waste, so I baked a cake.


Ingredients:
  • 1 1/2 Cups Coffee (I used Wegman's Cherry Chocolate)
  • 1/2 Cup Southern Comfort Cherry (or whatever you've got on hand)
  • 1 Cup of Unsweetened Cocoa Powder ( I used regular but I'm sure dark would be divine)
  • 1 Cup of Unsalted Butter Cut into Pieces- for expedited melting
  • 2 Cups of Granulated Sugar
  • 2 Cups Flour
  • 1 1/2 Teaspoons Baking Soda
  • 1/4 Teaspoon Salt
  • 1 Teaspoon Vanilla Extract
  • 2 Eggs
  • I didn't add this in mine- but a cup of chocolate chips would have added some sweet texture to this cake- just saying <wink>

For the Glaze:
This is where I got a little free spirited....so can you!
  • 1 1/2 Cups Powdered Sugar
  • 1 Tablespoon Butter- melted
  • 1 Teaspoon Vanilla Extract
  • Splash of Coffee- add until you reach desired consistency

Directions:
  1. Generously grease your lovely bundt pan with butter
  2. Heat oven to 325 ( you will bake on center rack)
  3. You will need a 3qt pan or larger, add coffee, whiskey, butter and cocoa powder- whisk or stir until your butter is melted
  4. Remove pan from heat and mix in sugar until dissolved- set aside to cool
  5. In a medium bowl whisk remaining dry ingredients (flour, baking soda & salt)
  6. IN a small bowl whisk eggs and vanilla
  7. Once chocolate mixture is cooled- I just added the flour mixture into the pot and whisked until incorporated, then added egg mixture. (this is also where you might want larger than a 3qt pot- if you decided to mix in the pot- it made a teensy mess in a 3qt)
  8. This is where you would stir in the cup of chocolate chips if you decide on adding them
  9. Pour batter into greased bundt pan- place in oven and bake for 40 minutes (more or less depending on your oven)
  10. Cool cake completely before removing from pan- you might need to loosen it a bit.

Whisk Away


Almost Finished Product!
Frosting Directions:
I took all of the ingredients above and whisked until desired consistency and drizzled back and forth until it was all used up.

Enjoy!
XoXo

Tuesday, August 19, 2014

Tuesday Shoesday: Audrey Brooke on Repeat

Shoes: Audrey Brooke, Click Here
Don't break the bank with this staple pair of gladiator sandals from Audrey Brooke. This style is called the "Lanita" and the take on gladiator is spot on in an understated and oh, so versatile way!

Well hello comfy!
 I received a DSW "we miss you" coupon because I hadn't shopped there for ages and this was right before the move, so I thought- hey why not- who am I to leave $10 bucks on the table? I was West coast bound and on the hunt for a comfortable sandal that was dressier than your average flip flop (which, if you were wondering- my go to brand for flips: Flojos).

Black with Silver Hardware
After perusing up and down those temptingly long aisles and passing on a pair of gorgeous $$$ gladiators, I found the Lanita! $49.95 is typically more than I would spend on a sandal- but with a coupon they would be $39.95- not bad. I've got to say, these are the MOST comfortable pair of sandals. Just don't wear them on a jagged boardwalk- you are setting yourself up for a scuff or two. I pretty much live in these sandals; from dresses, skinny jeans to capris- they go with everything and add a touch of style and comfort to my look. ((Sizing note: I am usually always an 8.5 but found the size 8 was the perfect fit for me.))

I 'heart' these shoes!
The black pair came later when I realized these were a must have for my summer wardrobe. What shoes do you currently have on repeat?
XoXo

Monday, August 18, 2014

ThriftyGlam OOTD: Softened Edges

        Necklace: TJMaxx / Blazer: LaROK {old} / Tee: Mindy Mae's Market-Click Here / Clutch: Francesca's / Destroyed Denim: Target-Click Here / Shoes: Target-Click Here
 I've been following Mindy Mae's market on instagram and absolutely love the sentiment behind this graphic tee "Kindness is always stylish." Their IG account is always running great promos and specials and one day it was discounted and proceeds would benefit an employee's medical expenses. Good cause and a fun shirt- win-win! Since the shirt is ultra girly, I decided to pair it with a LaROK blazer boasting embellished shoulders and a satin tuxedo-esque lapel. To keep with the edginess I decided on this statement necklace (reminiscent of a J. Crew design) from T.J.Maxx.


The denim was a "stretch" for me (no, seriously they are so stretchy and comfy) because I never buy light wash denim anymore and I wanted to ease myself into the destroyed denim look. The last time I went all out destroyed denim was the summer before I started college; enter (surprise) light wash, super ripped up, faux grass and paint stained jeans from Abercrombie & Fitch. They were so well destroyed that I was at a diner in NYC with my mom walking to the ladies room and a woman we passed said quite loudly "oh my, did you see her pants, she must be poor." Little did she know those jeans were actually quite pricey for what they were.

Sterling Marcasite Ring: Vintage
 Lesson learned, on the pricey factor- I was strolling through target and came upon these jeans- tried them on- oh how easily they fit and brought them home with me. $29.99 for a pair of jeans- I can sit well with that. Low and behold the VERY next day I get the "weekly ad" email from Target and all denim is 40% off- back the next day, I got my price adjustment for $17.99 jeans- woot!

Faux Suede Ankle Strap Pumps: Mossimo

Sally Hansen: Chrome Nail Polish

Back Zipper Detail


Thanks for stopping by! I'd love to hear where your favorite pair of distressed denim is from. Do you prefer skinny or boyfriend?

XoXo

Friday, August 15, 2014

Clotheshorse: Overwhelming Wardrobe Woes


You know that saying "clotheshorse"? {which by the way is considered <gasp> derogatory- who knew!?} Lately, I've been feeling a bit more like a "clothes mule". I have too many clothes- no, really wayyy too many. Some articles of clothing have been with me for what feels like since the beginning of time. I've always been a little bit excessive and have tendencies that lean toward the hoarder variety (I take really good care of my wardrobe). I know I'm not alone in my ridiculous rationalizations with why I should hold onto something versus letting it go. For example: What if I need this {enter specific color here} top for a costume or a theme day at work... do I really want to go out and buy it again when I can just hang on to it…and so it goes. I come up with the dumbest excuses for why I keep things. The other thing that I've got going against me is my memory. I can literally just hold an item  and be immediately transported back to some magical moment in time. Instant memory recall associated with an overabundance of STUFF. So unless it's something super meaningful, like "he proposed to me in this dress", or "I graduated law school and these were the shoes I wore"- those are some serious momentous occasions and worth hanging on to. Rationalizations on keeping something you really have no interest in seeing in your closet or ever wearing again- probably time to set that little birdie free.

Non-artist- will stick to baking :)

So as one of my previous posts already mentioned; I've recently moved- from one coast to another.
Here's what I have learned: 
Each time I have moved I have acquired more space and ultimately more stuff- YIKES!
This last time we had a tight timeline to sell the home and in order to do that in an expeditious fashion, we staged it beautifully and kept it immaculate- it was dubbed "the model home." As noted above- I have soooo much stuff. You really can't sell a spacious closet the size of a room when it looks less than half it's size because it's crammed with gobs of clothing, shoes and accessories- stacked from floor to ceiling (like no joke- I'm kind of embarrassed). So I graciously took some wise advice and pared down the closet with key items. Clothing that stayed were items I would need to get dressed for work comfortably for the next month or so and some casual weekend wear and obviously a few of my "art pieces." I refer to certain pieces in my closet as "art" because yeah, maybe I haven't worn them yet or they will only see the light one special day- but they are gorgeous and make me happy just looking at them; magnificent wonders of craftsmanship and exuding of femininity.


What did I learn from all of that? It was so much easier getting dressed for the day. LIKE OH-M-GEE soooo much easier. This is a topic I will likely touch on several times as it seems to be a constant struggle and I really want my full-time closet to feel like the staged one did. Anyone else out there having a similar dilemma?

XoXo

Thursday, August 14, 2014

ThriftyGlam OOTD: Blue Ruffles & Denim

Top: Odille Anthropologie- old / Similar: HereHere
You should never feel like you've wasted a good outfit when your day turns out to be kinda lame- like mine did {yay for spending 2 hours at the DMV}. Clothes are meant for much more than making us acceptable for public consumption but to make us feel good. I always feel so much more confident when I'm rocking a cute outfit or a fab piece of jewelry. Lately I have been eyeing my closet with trepidation. There are many... okay a lot of pieces that I have never worn or have even begun to figure what they would pair well with. Case in point: the top above. I purchased this sweet little find on one of my last visits to Tucson. It's an adorable peplum-esque ruffled Odille blouse that I scored for next to nothing at Buffalo Exchange {if you've never been: click here to find your nearest location}. I prefer my tops to be a little bit on the longer side- and if we're being honest it's for 2 reasons. First, I'm tall- so tops that are too short in length look disproportionate. Second, I'm not a huge fan of my legs-- so, longer tops = inside my comfort zone. I'm all about utilizing what I have hanging in the closet and if it doesn't make the cut it's out. I took this little  ruffled number out for a test drive and I was pleasantly surprised. I think she may be a keeper.

Necklace: Francesca's- from last year


Botkier Bag: Old, Similar Smaller Style: Here

Sunglasses: Gucci-old, Similar: Here, Denim: Citizen's of Humanity- Similar: Here, Shoes: Aerosoles-old


So what do you think of the Odille top? Keep or let go?
XoXo

Tuesday, August 12, 2014

Pinspired: Nails with Glitter Moons


A fresh manicure is always tres chic.  It seems everywhere I look there is an abundance of creativity happening in the world of nail art. I generally don't polish my nails because for some strange/sad reason my nails weaken and reject the polish. I'm talking professional manicure starts chipping on day two. Sad, right? My nails just want to be free, much to my dismay.


 Anyway, I came across this pin and thought it was just beyond gorgeous and I used this as my "pinspiration" to create my own take on this glitter trend.

Love #nailart? Follow @TrendyPolish on Instagram!
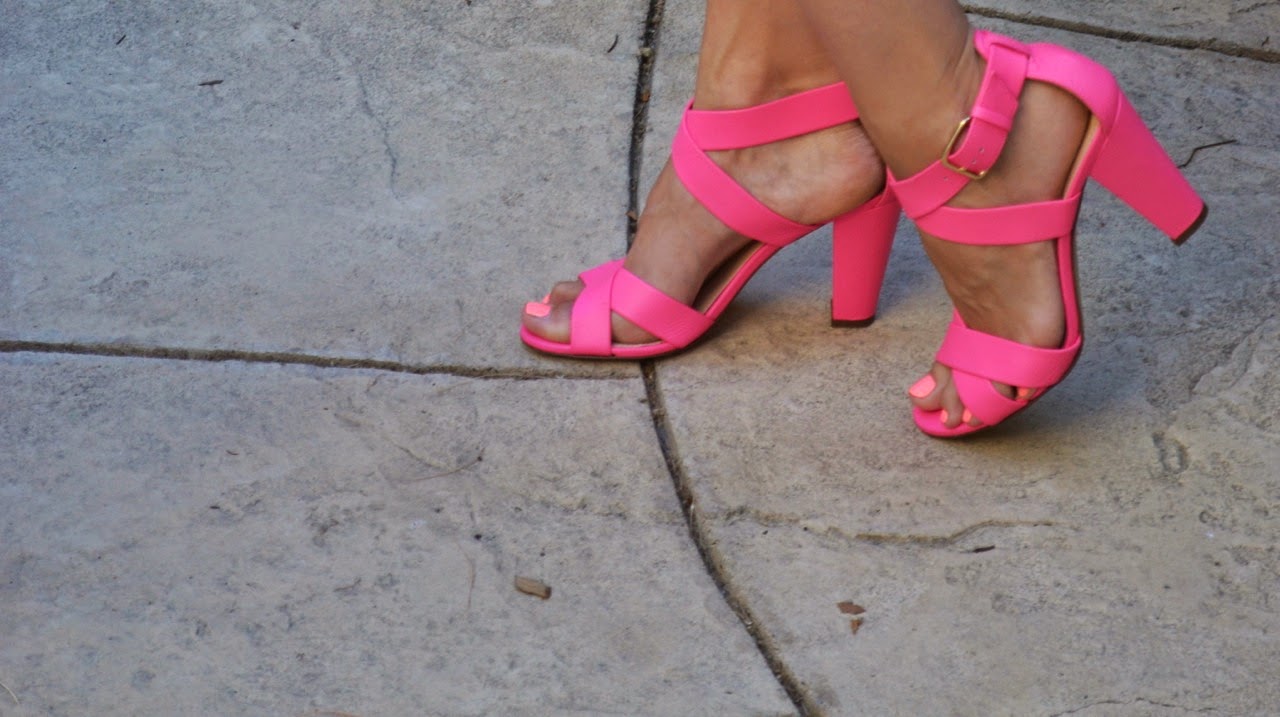
I chose Hot Pink because I'm beyond obsessed with this color. It's usually one of my go-to colors for my toes. "Like mother, like daughter"- growing up my mom had a vast collection of various shades of bright pink polish- perhaps this is where the love affair with hot pink started?

I applied a quick base coat and then did two coats of the hot pink polish {China Glaze in "Shocking Pink"} After the last coat dried, I grabbed the Revlon "Girly" and took off as much excess polish as I could manage at the lip of the bottle. Doing that left behind a nice little clump of glitter to work with. With this clump I gently dabbed it around my "moons"-- once satisfied with the concentrated amount of glitter- I performed a delicate swoop up the rest of my nail to create a sparse scattering. To top it all off: a final coat of Sech Vite- the fastest drying top coat I have ever encountered, EVER.

Finished Product Paired With a Sweet Arm Party

1st Two Bracelets: Unknown: Aqua Stretch Bracelet: J.Crew --Sold Out-- Similar Here/  Hot Pink: Headband-Old Navy/  Brass Woven & Beaded Bracelet: Andrea Bocchio --Similar Here

China Glaze: Shocking Pink & Flip Flop Fantasy


 If you are hunting for some seriously fab neon polish- China Glaze doesn't disappoint! Above are my two absolute favorites that are in constant rotation. My only advice would be that you need a top coat, otherwise this polish tends to dry in a pseudo matte finish.

What's your favorite Hot Pink Polish? Share with me in the comments below!

XoXo

Sunday, August 10, 2014

What's Cooking Good Lookin'? Recipe Feature: Vintage Cherry Nut Cake

With our cross-country move having just taken place, we had my future MIL (mother in-law) come out to celebrate her birthday. Luckily, I was an unpacking fiend so our home was mostly unpacked and most importantly the guest suite was the peaceful mini retreat it was intended to be. Already itching to get into the kitchen and create some goodies, I inquired as to what the my MIL's favorite dessert was. Answer: a cherry nut cake that only her mother could perfect- the challenge was on! Instead of trying to re-create something I'd likely never be able to do, I instead hunted down similar recipes and added some of my own baking flair to pay homage to the original.


Ingredients:
  • 2 Jars of Maraschino Cherries w/out Stems (drain but set aside the excess liquid)
  • 3 1/4 Cups Flour
  • Pinch of Salt
  • 2 Tsp Baking Powder
  • 1 Small Package of Chopped Walnuts (you can do more or less)
  • 1 Tsp Baking Soda
  • Just a drop or 2 of Almond Extract
  • 2/3 Cup Milk (I used skim)
  • 1 Cup Butter (unsalted & room temperature)
  • 2 Cups of Sugar
  • 4 Eggs
Frosting:
  • 16oz Powder Sugar
  • A few drops of Red Food Coloring
  • 3 Tablespoons of reserved Maraschino Juice
  • 2 Tablespoons of Light Corn Syrup
  • 1 Tsp Vanilla Extract
  • 1/2 Tsp Almond Extract
  • 1/2 Cup Unsalted Butter (cut into Cubes- room temperature) 
Cake Instructions:
  1. Oven should be pre-heated to 350 degrees, center rack.
  2. Take Two Round Cake Pans- I use silicone ones like these, Grease them with butter or spray- I prefer butter- be generous!
  3. Take 1.5 of the jarred cherries and chop- either in a food processor or by hand ( I did by hand which took forever, and stained my hands- temporarily of course!)
  4. Once chopped either strain or go straight to patting them dry with a few paper towels. Next add the chopped cherries to a small bowl with 1/4 cup of the flour. You are continuing to dredge out the excess moisture.
  5. Next combine the dry ingredients, 3 cups flour, 2 teaspoons baking soda, 1 teaspoon baking soda, itty bitty pinch of salt- mix together & set aside
  6. Time to cream! Mix on a high speed, 2 cups sugar with 1 cup butter, beat until fluffy. Next add the 4 eggs, and 2 drops of almond extract and continue to beat for 2 minutes.
  7. Add the chopped cherries to the butter, sugar ,egg mixture- beat for about 1 minute.
  8. Next (choose which bowl is largest or pull out a new one) Alternate beating in the wet & dry ingredients- while slowly incorporating the 2/3 cup milk and 1/3 cup of the excess cherry juice.
  9. Once combined, stir in the chopped walnuts.
  10. Divide batter equally among your prepared rounds.
  11. Bake for 20-25 minutes (will vary depending on your oven and type of pan you use)
  12. Cake is ready when an inserted toothpick comes out clean, cake will appear to have shrunk away slightly from edge of pans, and the top should bounce back when gently pushed in the center.
  13. Cool just enough in the pan to then remove onto cooling rack- sans pan.
  14. ((I removed mine when still too hot and nearly broke the first layer- I also slightly overcooked mine due to not being well acquainted with our oven yet))
  15. Once removed from pans and still cooling- take a brush and dip it into the remaining cherry juice- I was very generous with brushing this on.
  16. Start making the frosting: see below!

Frosting Instructions: 
  • 16oz Powder Sugar
  • A few drops of Red Food Coloring
  • 3 Tablespoons of reserved Maraschino Juice
  • 2 Tablespoons of Light Corn Syrup
  • 1 Tsp Vanilla Extract
  • 1/2 Tsp Almond Extract
  • 1/2 Cup Unsalted Butter (cut into Cubes- room temperature)
Combine all of the above ingredients into a large bowl (minus the food coloring). Beat on low and gradually increase speed. Keep beating until desired texture is achieved. The maraschino juice will provide a very faint pink color- add food coloring one drop at a time until you get the shade of pink that suits your fancy.

I did a very thin layer of frosting between the two layers to ensure I had enough to cover the cake.
Once the frosting hardened a bit I sliced the remaining cherries in half and dried them in a paper towel one by one as I placed them on the cake- you don't want them to slide off!

What next? Slice this baby up and enjoy! {PS: individual slices freeze up really well- so when you have a sweet craving pull a piece out and let it come to room temperature!)

Added a little vintage flair to the decor with crochet flowers


Since I baked mine a couple minutes too long- I served this with some vanilla bean ice cream


Friday, August 1, 2014

Moving from DC to LA #Roadtrip

We say goodbye to our life of just over four years in Northern Virginia and hello to endless sunshine in our new chapter taking place in Southern California. Here's a little snippet from our road trip!

On the first day, we wear pearls
I've moved many times since turning 18 (from Tucson straight to the Bronx: Go Rams!), for now we're staying put and I couldn't be happier. This last move was a doozy- seriously there is no better term for it than that. With my fiance being gone weeks at a time for work, myself working full-time and keeping our ridiculously over sized home {for 2} clean and tidy for showings was a true test of time management and my ability to work under pressure. It was all worth it to now be settling in and checking out our new surroundings. Later on I will share what I learned in staging our home and the process of preparing for a cross-country move- so get ready!
From Thumbs' perspective

Windblown & exhausted but happy :)

Now that we are here. We made a pact to go to the beach every Sunday in June- we are loving this new tradition and have carried it into August!

Zuma Beach, Malibu
Thanks for stopping by ThriftyGlam, I can't wait to share more about this new adventure, fun fashion, recipes and oh so much more!  XoXo